This article takes a look at practical steps to move your Magento store from one hosting provider to another. If you’d like us to do this for you our experienced Magento developers can help – contact us for more information.
Why Make the Move?
There are various reasons you might want to move. Perhaps your hosting provider can’t offer servers up to scratch for Magento’s demanding requirements. Perhaps they’re not reliable enough. We’re covered on both of these fronts as we use the excellent UKFast.
Whatever the reasons, you’ve reached the point where you need to make the leap, but how should you do it? We’re here to help make this move as smooth as possible.
Backup, Backup, Backup (and test)
This step is absolutely vital. Before you sign or agree to anything with a new hosting provider you must backup. Backup both your database and your file system. Once you’ve done all this, however, you should test that you can restore from your backup. Hopefully you are doing this sort of thing already!
Backing up your Magento database
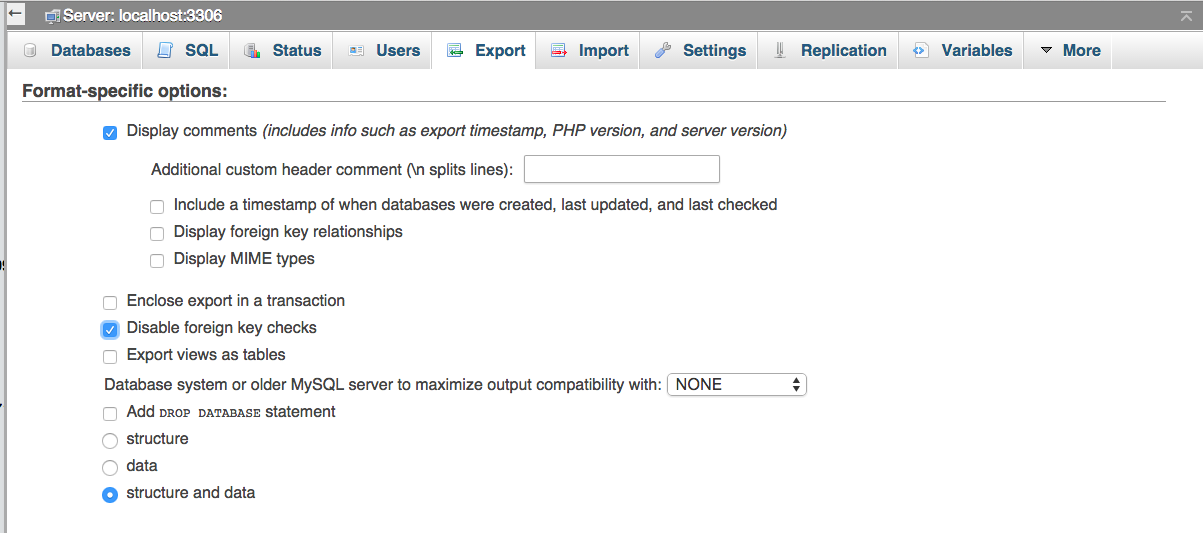
If your server has phpymadmin then we can avoid the need to get onto the command line. Navigate to phpmyadmin and go to the tab marked ‘export’. Set the export type to ‘custom’ and select the appropriate databases. Next disable foreign key checks (see below) and hit Go.

Next try importing the dump into an empty database and see if it goes to plan. If you get stuck try the Magento Database Repair Tool or contact us.
If you don’t have phpmyadmin you’ll need to do this ‘by hand’ as it were. Get shell access and do the following, substituting in your hostname, username, database name and choosing a filename for the backup:
mysqldump -h HOSTNAME -u USERNAME -p DATABASENAME > BACKUPFILE.sql
Transfer The Magento Filesystem
It’s nearly time to grab a cup of tea (or your beverage of choice) as this step could take a while. Especially if you have a large store consisting of many products.
If you have FTP access you can begin the process of copying the files down to another location. What other ways are there though?
You can use the feature in the Magento admin, go to System -> Tools -> Backups and run a System Backup:

If you’re feeling handy with the command line there is of course an option for you:
scp -r user@host:/path/to/site /local/machine/path
This will copy the entire site to your local machine. It may not be feasible if the site is large – I’ve seen a site take in excess of 36 hours to copy via scp, reduced down to just under 2 hours when keeping the backup on the same server. To do it this way, log in via ssh and use cp (copy) with a recursive flag (-R) to copy to another location on the server. This is quicker for an easy backup but if you are moving hosting you’ll have to do it the slow way, sorry!
Making the Move
Now we’re ready to get your site onto the new server.
First of all, let’s get the filesystem put into place. This is just the reverse of the backing up process in the previous step. Simply move the files into the document root, for us this is currently /var/www/vhosts/sitename/httpdocs but yours may vary depending on configuration. If unsure, you could always put a simple html file in the document root first and see if you can browse to it. (You’ll need to use the IP of your sever as you won’t have moved the domain name yet).
Next you just need to open up app/etc/local.xml to enter the correct database details in the following section:
<host><![CDATA[HOSTNAME]]></host><username><![CDATA[USER]]></username><password><![CDATA[PASSWORD]]></password><dbname><![CDATA[DATABASENAME]]></dbname>
Change [HOSTNAME], [USER], [PASSWORD] and [DATABASENAME] to the appropriate values and save.
Next we’ll pop the database into place.
As with the filesystem step this is essentially the reverse of part 1. You can import via phpmyadmin or use the command line:
mysql -h HOSTNAME -u USERNAME -p DATABASENAME < BACKUPFILE.sql
Now clear /var/cache & /var/sessions and we’re nearly ready to go – we just need to sort out the domain name.
Moving the Domain Name
If you’re getting a new domain name you’ll need to change references to the old one in the appropriate tables. Go into the core_config table and by ‘path’ put the new URL into the ‘value’ field of web/unsecure/base_url and web/secure/base_url.
If the domain name is staying the same you’ll still want to point the DNS system to your new location for it. To do this log in to your domain name provider and head to the management area. Edit the A record to the IP of your new hosting provider.
This can take upto 24 hours. We advise putting your old site into maintenance mode (so you may want to start the DNS move at your quietest point). This means no more orders will occur at the old location, but for anyone who’s had the DNS update early they can place an order at the new location.
So there you have it – how to move your Magento store to a new hosting provider. We hope you’ve found that useful and if you would like us to do the move for you contact us for assistance & information.


